

 $49.99 USD
$69.99 USD
$49.99 USD
$69.99 USDSeeding Success
A Guide to Starting Your Garden Indoors
If you're excited to get a head start on your garden and try new plant varieties, starting your own seeds indoors is a great way to go. It's a fulfilling experience that allows you to give your plants a healthy start and extend your growing season. Here are some helpful tips to get you started on your indoor seed starting journey in preparation for spring.
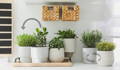
Choose the right seeds and containers
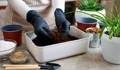
Start by selecting seeds that suit your region and climate. Check the seed packet for instructions on planting depth and spacing. Use containers that have drainage holes to prevent waterlogging. You can use a variety of containers, including seed trays, peat pots, plastic cups, or even repurpose old containers like egg cartons or milk cartons.

Use the right soil mix
Using high-quality seed-starting mix is important. The mix should be light, fine-textured, and well-draining. Avoid using garden soil as it can contain harmful organisms and be too heavy for seedlings. You can buy seed-starting mix from gardening stores or make your own by combining peat moss, vermiculite, and perlite.
Provide proper lighting and temperature
Seeds need warmth, moisture, and light to germinate and grow. Place your containers in a warm, well-lit area such as near a south-facing window or under grow lights. Keep the temperature between 65-75°F (18-24°C) during the day and 55-65°F (12-18°C) at night. You can use a heating mat or space heater to regulate the temperature, especially if you live in a colder region.

Water and fertilize appropriately
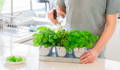
Water your seeds regularly, but be careful not to overwater, as it can lead to mold and fungal growth. Moistening the soil surface with a spray bottle or watering can is ideal. Avoid getting the leaves wet as this can cause damage. Once your seedlings have their first set of true leaves, you can start fertilizing them. Use a balanced, water-soluble fertilizer and follow the instructions on the package. Don't over-fertilize, as it can lead to burned roots or stunted growth.
Label your containers
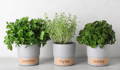
It's important to label your containers with the plant variety and the date you planted them. This helps you keep track of your plants and ensure that you're giving them the appropriate care.
Rotate your containers
Rotate your containers every few days to ensure that your seedlings receive even light exposure. This helps prevent them from leaning towards the light and becoming spindly.
Thin out your seedlings
Once your seedlings have grown a few inches tall, thin them out by removing the weaker seedlings. This helps give the stronger seedlings more room to grow and reduces competition for nutrients and water.

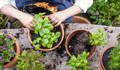
Transplant seedlings carefully
Once your seedlings have outgrown their containers, they can be transplanted into larger pots or directly into the garden. Before transplanting, harden off your seedlings by gradually exposing them to outdoor conditions over the course of a week. This helps prevent shock and allows your seedlings to adjust to the new environment.
In conclusion, starting your seeds indoors requires patience and attention to detail, but it's a fun and rewarding experience that's worth the effort. By following these tips and providing the proper care, you can give your seeds the best start possible and look forward to a successful harvest in the spring. Happy planting!
